Private Nuget Servers – VS Team Services Package Management

A while back i setup a Klondike server for hosting our internal nuget packages. We use it for both internal libraries and octopus.

Microsoft recently released the Package Management feature for VSTS (Formerly know as VSO), the exciting thing about Package Management is that they have hinted they will include support for npm and bower in future, so you will have a single source for all your package management.

VisualStudioMarketPlacePackageManagement

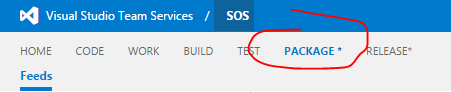
After Installing in VSTS you will get a new “Package” option in the top bar.

PrivateNugetServerOackageManagerVSTS

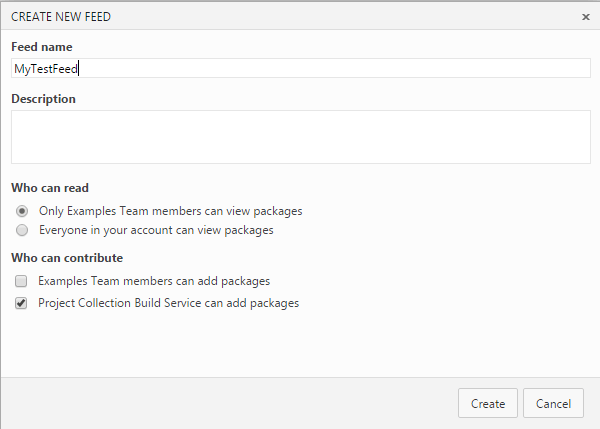
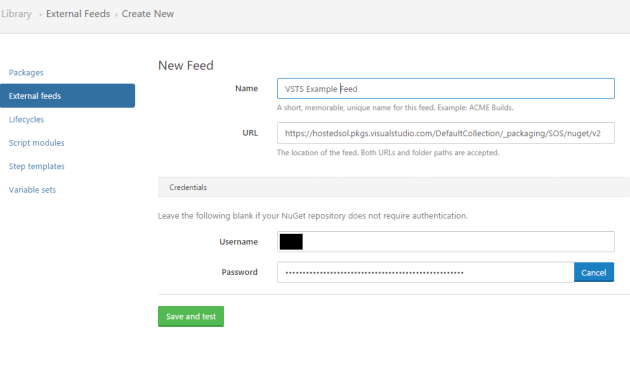
From here you can create new feeds. In my case I’ve decide to break up my feeds to one per project, but you could easily create more per project if you had for example separate responsibilities where you wanted to have more granular permissions. You can restrict the Publish and Read rights to the feeds to users OR groups within VSTS so its very easy to manage, unlike my hack around for permissions in my previous post about Klondike.

CreateNewNugetFeed

Now because we use TeamCity I have considered creating the build service their own Account in VSTS as they need credentials, but in this example I’m just using my own account.

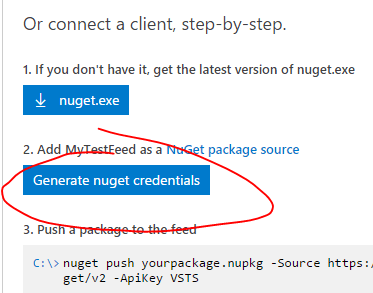
You will need to change the “pick your tool” option to nuget 2.x to get your credentials to use in the TeamCity Steps.

OldVersionOfNugetFeed

Then click “Generate nuget Credentials” and grab the username and password out.

GetNugetCredentials

NugetFeedCredentials

Next hop over to your TeamCity Server, and edit/add your build configuration.

It’s important to note that you will require at least TeamCity version 9.1.6 to do this, as there is a fix in here for nuget credentials.

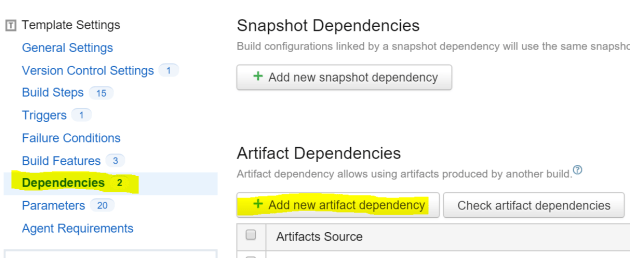
First jump into “Build Features”, and add a set of nuget credetails with the URL of your feed that you got from the VSTS interface.

AddNugetServerFeedCredentialsTeamCity

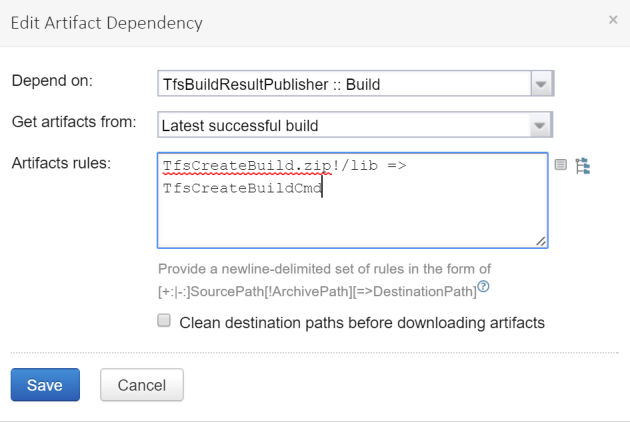
Then jump over to your Build steps and edit/add your nuget steps. Below is an example of my publish step.

NugetPublishStepTeamCity

The API key I’ve set to “VSTS” as per the instructions in the web interface of VSTS.

And we are publishing.

TeamCityBuildOutputNugetPublishVSTS

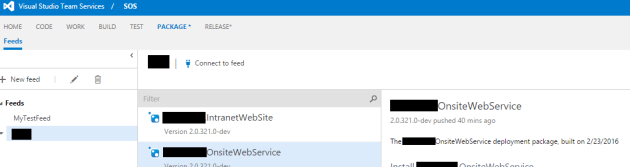
You will see the built packages in the VSTS interface when you are done.

NugetPacakgeVSTSWeb

Now if you have an Octopus server like us you will need to add the credentials into it as well into the nuget feeds section.

OctopusAddExternalNugetFeedVSTS

OctopusNugetPackageVSTSFeed

And its that easy.

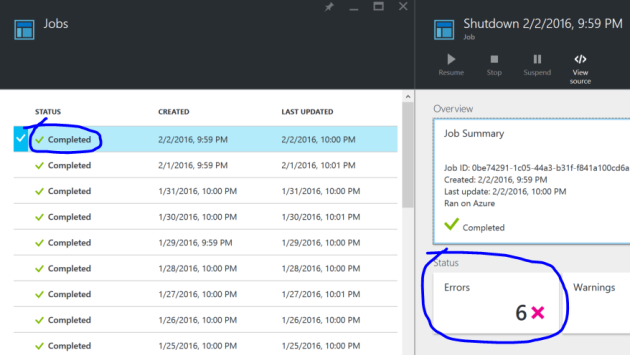
One of our concerns about the Klondike server we setup was capacity. Because we have more than 12 developers and run CI with auto deployment to development environment, we are generating a large number of packages daily as developers check-in/commit work, so over a period of months and years the server has become quite bloated, though to give it credit i am surprised at how long it took to get bloated.

Some queries are taking upwards of 15-20 seconds at times and we have an issue (which I have not confirmed is related) where packages are randomly “not there” after the build log say they have been successfully published.

I am hoping that the VSTS platform will do us for longer, and it has the added advantage of the granular permissions which we will be taking advantage of as we grow.


Exception Logging and Tracking with Application Insights 4.2

After finally getting the latest version of App Insights Extension installed into Visual Studio, its been a breath of fresh air to use.

Just a note, to get it installed, I had to go to to installed programs, hit modify on VS2015, make sure everything else was updated. Then run the installer 3 times, it failed twice, 3rd time worked.

Now its installed I get a new option under my config file in each of my projects called “search”.

ApplicationInsightsVisualStudioExtension.PNG

This will open the Search window inside a tab in visual studio to allow me to search my application data. The first time you hit it you will need to login and link the project to the correct store though, after that it remembers.

ApplicationInsightsSearchExceptionsVisualStudio

From here you can filter for and find exceptions in your applications and view a whole host of information about them. Including information about the server, client, etc. But my favorite feature is the small blue link at the bottom.

ExceptionInformationApplicaitonInsights

Click on this will take you to the faulting function, it doesn’t take you to the faulting line though (which i think it should) but you can mouse over it to see the line.

LinkToCodeWhereExceptionWasThrown

One of the other nice features, which was also in the web portal. is the +/- 5 minutes search.

5MinuteSearchEitherSideOfException

You can use this to run a search for all telemetry within 5 minutes either side of the exception. In the web portal there is also an option of “all telemetry of this session”, which is missing from the VS interface, I hope they will introduce this soon as well.

But the big advantage to this is if you have setup up App Insights for all of your tracking you will be able to see all of the following for that session or period:

  • Other Exceptions
  • Page Views
  • Debug logging (Trace)
  • Custom Events (If you are tracking thinks like feature usage in JavaScript this is very handy)
  • Raw Requests to the web server
  • Dependencies (SQL calls)

Lets take a look at some of the detail we get on the above for my +/- 5 Minute view

Below is an SQL dependency, this is logging all my queries. So I can see whats called, when, the time the query took to run, from which server, etc. This isn’t any extra code I had to write, App Insights will track all SQL queries that run from your application out of the box, once setup.

AppInsightsSQLDependancy

And dependencies won’t just be SQL, they will also be SOAP and REST requests to external web services.

Http Request monitoring the detail is pretty basic but useful.

HttpRequestMonitoring

And Page views you get some pretty basic info also. Not as good as some systems i have seen, but defiantly enough to help out with diagnosing exceptions.

PageViewAppInsights

I’ve been using this for a few days now and find it so easy to just open my solution in the morning and do a quick check for exceptions, narrow them down and fix them. Still needs another version or two before it has all the same features as the web interface, but defiantly worth a try if you have App Insights setup.


Building C# projects with Cake Build

I’ve been helping out the nunit team the last few weeks in my spare time, one thing that I was interested to check out is cake, which they are using for building.

Off the bat I don’t recommend using visual studio to edit the cake files, I was unable to get the IDE to work correctly, it just made a mess of the file. I’ve been using visual studio code instead which has an addon for cake.

There is also a VSTS addon available for a cake build step, or you can just run a powershell command line if your build server doesn’t have a build step for it OOTB.

Cake chains tasks together with dependencies and criteria.


Task("BuildProject")
.Does(() =>
{
// code to build your project ehre
});

You can then use the IsDependant and WithCriteria methods to chain dependencies like below.

Task("BuildProject")
.IsDependentOn("InitializeBuild")
.WithCriteria(IsRunningOnWindows)
.Does(() =>
{
// code to build your project here
});

Task("InitializeBuild")
.Does(() =>
{
// code to do stuff before building your project here
});

When you run cake from the command line you need to specify the Task name which is your entry point. With nunit what the guys have done is defined a number of tasks that are the main target entry points at the end of the cake file an example would be something lie the below when you specify a “Release Build” target it does the steps to Build, Test and then package in that order.


Task("ReleaseBuild")
.IsDependentOn("Build")
.IsDependentOn("TestAll")
.IsDependentOn("Package");

Task("Build")
.Does(() =>
{
// code to Build your project here
});

Task("TestAll")
.Does(() =>
{
// code to run your tests here
});

Task("Package")
.Does(() =>
{
// code to package up your project here
});

Arguments from the command line can be picked up from within the script using the arguments method.


// if not specified at the command line the value will be Debug
var configuration = Argument("configuration", "Debug");

Building projects from within cake is pretty straight forward, you just need to call the built in MSBuild method


// Use MSBuild
MSBuild("MySolution/MyProject.csproj", new MSBuildSettings()
.SetConfiguration("Release")
.SetMSBuildPlatform(MSBuildPlatform.Automatic)
.SetVerbosity(Verbosity.Minimal)
);

If you want to use Travis CI you’ll need to use XBuild instead of MSBuild, and also get a build.sh file in your project to kick off the cake script.

Here is a ref to their cake file for nunit that we have been working on

I’m not “blown away” with cake so far, the good parts are:

  • It’s multi-platform so you can run free Travis CI builds with it if you are working on an opensource project like nunit.
  • Its easy to get a consistent experience if you are using multiple build servers (appveyor, Travis, TFS, etc).
  • The scripting language is in C# so for some developers who might struggle with PowerShell or possible node.js/javascript in the case of gulp, its a lot more familiar
  • While there isn’t a “huge” amount of libraries out there its got all the core stuff you need (nuget, git, msbuild, etc.)

The bad parts that I don’t like are:

  • The documentation is pretty light, and its hard to find sites out there with examples
  • If you actually want to support builds on Travis there is language limitations to be aware of, so you end up with functioning cake script on a windows box that will fail when run on Travis the below example code will fail on cake in Travis but work on windows


var MyString ="A string";

void WriteStringConsole()
{
Console.WriteLine(MyString);
}

Task("MyTargetTask")
.Does(() =>
{
WriteStringConsole();
});

  • While the ability to have a consistent build experience across multiple build servers is good, who actually uses multiple build servers to build a single product? I think this will be useful for open source products where another company may want to fork and start building a version for their use, but I don’t see this as advantageous for private code.
  • I haven’t found an effective way to do templates with it yet, happy to be corrected on this as the documentation is light. The build templating system we use in TeamCity is awesome, the ability to use one central template then tweak it slightly for each project is second to none, and TFS seem to be following suite with this too, using a single script file means this becomes a lot more hard, sure you can toggle things on and off with code, but in TeamCity there is a “GUI” to do this.

Overall I think cake is cute. It defiantly has its place in open source projects, but I’m not going to be moving projects over to it en masse.


TeamCity Build Artifacts

Build Artifacts I find are handy for things you want to throw around on the build server, such as command line tools from open source projects, etc.

Where I would make the call over a build artifact vs a package (npm, nuget, etc.) is when it’s something that needs to be run on the developers local, i.e. packages will downlaod to both the build server and the developers local, where as a build artifact is really only designed for use on the build server.

Build Artifacts are also handy for when you need to break builds into multiple builds for stages.

We’ve got a few TFS command line tools that we use to update data in TFS from our TeamCity server, all are built from github projects, so these are good examples of a command line tool we build internally that is only used on the build server itself.

You could use build artifacts for other things as well, but I prefer for anything serious putting it into a package manager, as this allows for better version control management.

The artifact output is controlled from the General Tab in you build’s Configuration Settings.

TeamCityBuildArtifactsGeneralTab

Once you have at least one successful build run you can use the folder tab to browse the build output and pick what you need (normally in the bin\release folder).

The format you need to use is

SourceFileOrFolder1 => TargetFileOrFolder1
SourceFileOrFolder2 => TargetFileOrFolder2

You can specify a zip file for your output which i would recommend to save space. to do this you simply give it the location in the format of “MyFile.zip!/Subfolder” and it will compress your output into a folder in the zip file.

SourceFileOrFolder1 => TargetZipFile!/TargetFileOrFolder1
SourceFileOrFolder2 => TargetZipFile!/TargetFileOrFolder2

After that’s done you can run a build and check the output in the artifact tab of the completed build

TeamCityBuildArtifactOutputInCompletedBuild

Once you have this working you can then go to other builds and add this output as a dependency.

So in the other builds you will use the dependence tab, as seen below.

TeamCityBuildArtifactDependance

And you need to use s similar format to include to files into this build.

SourceArtifactFolderOrFile => TargetBuildDirOutputFodlerOrFile

Again you can also use the ! to browse inside of zip files to pull out content

TeamCityBuildArtifactDepedancyAddNew.PNG

in the above example if will have the command line app i need in the build output folder under the TfsCreateBuildCmd folder.

So I can now add a build step that calls this command using “TfsCreateBuildCmd\TfsCreateBuild.exe” to call the command and do something.

And it’s that easy 🙂


Startup/Shutdown VMs in Azure after hours – Gotchas

A few of our VMs (Dev/test servers) don’t need to be on overnight so we have some scripts to shut them down. This is a little bit tricky in Azure because of the runbook credentials. These are easy to create, a good post here about it. But in all the articles I’ve read, no one mentions that the passwords in Azure AD expire, so every 90 days or so you have to go in and rest your passwords.

Another gotcha I ran into was that with the run books, errors don’t make them fail, only exceptions do. So i had to check for error states and throw.

So when my automation user’s credentials expired and started throwing errors, I got no alerts about this. Until that was, someone read that months bill 🙂

AzureRunbookStatusCompleteButErrorFromScript

So I’ve put together a little post on how to work around these as it’s not easy.

First of all, lets assume you have followed the above post already and have automation credentials already.

You then need to use powershell to set the user’s password to never expire. To do this you need download and install the following.

  1. Microsoft Online Services Sign-In Assistant for IT Professionals RTW
  2. Windows Azure Active Directory Module for Windows PowerShell 

After that you can use the following PowerShell script from you local to set the user’s password never to expire

WARNING: You cannot use a Microsoft LIVE account to run this script, you need to use an organisational account.


Import-Module MSOnline
# you cannot login with a LVIE account, it must be an organisational account
Connect-MsolService
Set-MsolUser -UserPrincipalName "myaccount@myorg.onmicrosoft.com" -PasswordNeverExpires $true

Now below is my shutdown and startup scripts that i set on a Schedule, with error detection for common errors in them

workflow shutdown
{
$Cred = Get-AutomationPSCredential -Name 'MyAutomationCred'

$a = Add-AzureAccount -Credential $Cred -ErrorAction Stop
if ($a.Subscriptions) {
Write-Output 'User Logged in'
} else {
throw 'User logged in with no subscriptions'
}
InlineScript
{
Select-AzureSubscription 'MySubscription'
#Array of server names here
$VMS = "web02","web03"
ForEach ($VM in $VMS)
{
$aVM = get-azurevm $VM
if($aVM -eq $null)
{
throw "Unable to get VM, check permissions perhaps?"
}
$VMName = $aVM.Name
Write-Output "Attempting to stop VM: $VMName"
Stop-AzureVM -ServiceName $aVM.ServiceName -StayProvisioned $true -Name $aVM.Name
}
}
}


workflow startup
{
$Cred = Get-AutomationPSCredential -Name 'MyAutomationCred'

$a = Add-AzureAccount -Credential $Cred -ErrorAction Stop
if ($a.Subscriptions) {
Write-Output 'User Logged in'
} else {
throw 'User logged in with no subscriptions'
}
InlineScript
{
Select-AzureSubscription 'MySubscription'
#Array of server names here
$VMS = "web02","web03"
ForEach ($VM in $VMS)
{
$aVM = get-azurevm $VM
if($aVM -eq $null)
{
throw "Unable to get VM, check permissions perhaps?"
}
$VMName = $aVM.Name
Write-Output "Attempting to start VM: $VMName"
Start-AzureVM -ServiceName $aVM.ServiceName -Name $aVM.Name
}
}
}

You will note the checks and throws as Errors are ignored by the runbook.


Sharing files between Visual Studio projects, where the file is included in the project

We have a standard deployment script that runs within the scope of the web app. It’s an Octopus PreDeploy.ps1 script. It uses things like the name of the project to make decisions about what to call the user account on the app pool, the web site name, the app pool name, etc. There is a few things we haven’t that can’t be covered by the standard octopus IIS step (e.g. one is that we deploy our web services to a versioned url, https://myservivce.com/v1.1/endpoint/).

If you are starting from scratch I might be inclined to not do what we did, and instead start from using separate steps for this, the new features in Octopus 3.3 support storing a script in a package that you could use for this.

So to share this between our projects we decided to put it into a nuget package and install it that way, this means though that we need to treat it like content, and not a dll, but it needs to be included in the project, so that octopack will bundle it up into the package.

To do this we created an install.ps1 and uninstall.ps1 files to include the files from the nuget package as a linked item in the visual studio project.

So the nuspec file needed to be modified as follows.

You will note the target of the (un)install files is set to tools, this will make them get executed by visual studio. And our file we want to add is added in the root.


<files>
<file src="PreDeploy.ps1" target="." />
<file src="install.ps1" target="tools" />
<file src="uninstall.ps1" target="tools" />
</files>

Then the install.ps1 file looks as follows.

You will note it uses MS Build libraries in the powershell to execute inside of visual studio. This allows us to use the handy “GetItems” method on the project, and return all content items, so we can check for previous versions and remove.

It needs to be a content item because octopack will only package content items out of the box.

This is further filtered for items which have the packge name in the path (e.g. it would look something like this “packges\MyDeploymentPackage\predeploy.ps1″). If you had multiple files to add you could use an array here to remove all files isntead of one.

We store this in a delegate because we can’t call remove mid loop (you’ll get an error), then remove after the loop has completed.

Then prepare a new content item and save it into the project. You could do a dir listing on that folder and add all files, if you wanted to do multiple.


param
(
$installPath,
$toolsPath,
$package,
$project
)
$predeployfilename = "predeploy.ps1"
# Need to load MSBuild assembly if it's not loaded yet.
Add-Type -AssemblyName 'Microsoft.Build, Version=4.0.0.0, Culture=neutral, PublicKeyToken=b03f5f7f11d50a3a'

# Grab the loaded MSBuild project for the projectcontent
$buildProject = [Microsoft.Build.Evaluation.ProjectCollection]::GlobalProjectCollection.GetLoadedProjects($project.FullName) | Select-Object -First 1

Write-Host ("Adding $predeployfilename into project " + $project.Name);
$PackName = $package.id;
Write-Host '$package.id' = $package.id
$nodeDeligate = $null

$buildProject.GetItems('Content') | Where-Object { $_.EvaluatedInclude -match $PackName } | ForEach-Object {
Write-Host "Removing Previous $predeployfilename Item"
$nodeDeligate = $_;
}

Write-Host '$nodeDeligate' = $nodeDeligate
if($nodeDeligate -ne $null)
{
$buildProject.RemoveItem($nodeDeligate);
Write-Host ("Removing old item: " + $predeployfilename);
}

$projectItem = Get-ChildItem $project.FullName;
$predeployfile = Resolve-Path ($installPath + "\" + $predeployfilename);
Set-Location $projectItem.Directory
$predeployrel = Get-Item $predeployfile | Resolve-Path -Relative

# For linked items the Include attribute is the relative path to that item, and the Link subproperty is the local display name.
$metadata = New-Object 'System.Collections.Generic.Dictionary[System.String, System.String]';
$metadata.Add('Link', $predeployfilename);

$target = $buildProject.AddItem("Content", $predeployrel, $metadata);

$buildProject.Save();
$buildProject.ReevaluateIfNecessary();

Write-Host ("$predeployfilename added.");

The uninstall.ps1 looks the same except it only has the step to remove not add. And its that easy!

Also to note that the contentFiles feature in nuget 3.3 which is not support by Visual studio yet may solve this too, i haven’t see it in action yet.