Upgrading to Visual Studio 2017 Project file format

The new project file format drops the list of included files, as well as moving the nuget references into the csproj are the two biggest changes that you should be interested in.

These changes will greatly reduces your merge conflicts when you have a lot of developers working on a single project

There is a couple of pain points though, the first is that VS 2017 wont update your project files for you and there is no official tool for this. There is a community one available though you can download it here

https://github.com/hvanbakel/CsprojToVs2017

This tool only does libraries though, if you do a web project you’ll need to edit the file and put in you settings manually as well as adding “.web” to the end of the project type


<Project Sdk="Microsoft.NET.Sdk.Web">

Running this on you project files will convert them, however we were unlucky enough to have some people that have been excluding files from projects and not deleting them. So when we converted a large number of old cs files came back into the solution and broken it, as the new format includes by default and you need to explicitly exclude, there reverse approach form the old format.

So we have some powershell we wrote to fix this, firstly a powershell function to run per project


#removeUnused.ps1

[CmdletBinding()]
param(
[Parameter(Position=0, Mandatory=$true)]
[string]$Project,
[Parameter(Mandatory=$false)]
[ValidateRange(10,12)]
[switch]$DeleteFromDisk
)

$ErrorActionPreference = "Stop"
$projectPath = Split-Path $project
if($Project.EndsWith("csproj"))
{
$fileType = "*.cs"
}
else
{
$fileType = "*.vb"
}
$fileType

&nbsp;

$projectFiles = Select-String -Path $project -Pattern '<compile' | % { $_.Line -split '\t' } | `
% {$_ -replace "(<Compile Include=|\s|/>|["">])", ""} | % { "{0}\{1}" -f $projectPath, $_ }
Write-Host "Project files:" $projectFiles.Count

$diskFiles = gci -Path $projectPath -Recurse -Filter $fileType | % { $_.FullName}
Write-Host "Disk files:" $diskFiles.Count

&nbsp;

$diff = (compare-object $diskFiles $projectFiles -PassThru)
Write-Host "Excluded Files:" $diff.Count

#create a text file for log purposes
$diffFilePath = Join-Path $projectPath "DiffFileList.txt"
$diff | Out-File $diffFilePath -Encoding UTF8
notepad $diffFilePath

#just remove the files from disk
if($DeleteFromDisk)
{
$diff | % { Remove-Item -Path $_ -Force -Verbose}
}

Then another script that finds all my csproj files and calls it for each one


foreach($csproj in (Get-ChildItem . -Recurse -Depth 2 | Where-Object {$_.FullName.EndsWith("csproj")}))
{
.\removeUnused.ps1 -Project $csproj.FullName -DeleteFromDisk
}

You can run it without the delete from disk flag to just get a text file with what things it will potentially delete to test it without deleting any files


Private Nuget Servers – VS Team Services Package Management

A while back i setup a Klondike server for hosting our internal nuget packages. We use it for both internal libraries and octopus.

Microsoft recently released the Package Management feature for VSTS (Formerly know as VSO), the exciting thing about Package Management is that they have hinted they will include support for npm and bower in future, so you will have a single source for all your package management.

VisualStudioMarketPlacePackageManagement

After Installing in VSTS you will get a new “Package” option in the top bar.

PrivateNugetServerOackageManagerVSTS

From here you can create new feeds. In my case I’ve decide to break up my feeds to one per project, but you could easily create more per project if you had for example separate responsibilities where you wanted to have more granular permissions. You can restrict the Publish and Read rights to the feeds to users OR groups within VSTS so its very easy to manage, unlike my hack around for permissions in my previous post about Klondike.

CreateNewNugetFeed

Now because we use TeamCity I have considered creating the build service their own Account in VSTS as they need credentials, but in this example I’m just using my own account.

You will need to change the “pick your tool” option to nuget 2.x to get your credentials to use in the TeamCity Steps.

OldVersionOfNugetFeed

Then click “Generate nuget Credentials” and grab the username and password out.

GetNugetCredentials

NugetFeedCredentials

Next hop over to your TeamCity Server, and edit/add your build configuration.

It’s important to note that you will require at least TeamCity version 9.1.6 to do this, as there is a fix in here for nuget credentials.

First jump into “Build Features”, and add a set of nuget credetails with the URL of your feed that you got from the VSTS interface.

AddNugetServerFeedCredentialsTeamCity

Then jump over to your Build steps and edit/add your nuget steps. Below is an example of my publish step.

NugetPublishStepTeamCity

The API key I’ve set to “VSTS” as per the instructions in the web interface of VSTS.

And we are publishing.

TeamCityBuildOutputNugetPublishVSTS

You will see the built packages in the VSTS interface when you are done.

NugetPacakgeVSTSWeb

Now if you have an Octopus server like us you will need to add the credentials into it as well into the nuget feeds section.

OctopusAddExternalNugetFeedVSTS

OctopusNugetPackageVSTSFeed

And its that easy.

One of our concerns about the Klondike server we setup was capacity. Because we have more than 12 developers and run CI with auto deployment to development environment, we are generating a large number of packages daily as developers check-in/commit work, so over a period of months and years the server has become quite bloated, though to give it credit i am surprised at how long it took to get bloated.

Some queries are taking upwards of 15-20 seconds at times and we have an issue (which I have not confirmed is related) where packages are randomly “not there” after the build log say they have been successfully published.

I am hoping that the VSTS platform will do us for longer, and it has the added advantage of the granular permissions which we will be taking advantage of as we grow.


Exception Logging and Tracking with Application Insights 4.2

After finally getting the latest version of App Insights Extension installed into Visual Studio, its been a breath of fresh air to use.

Just a note, to get it installed, I had to go to to installed programs, hit modify on VS2015, make sure everything else was updated. Then run the installer 3 times, it failed twice, 3rd time worked.

Now its installed I get a new option under my config file in each of my projects called “search”.

ApplicationInsightsVisualStudioExtension.PNG

This will open the Search window inside a tab in visual studio to allow me to search my application data. The first time you hit it you will need to login and link the project to the correct store though, after that it remembers.

ApplicationInsightsSearchExceptionsVisualStudio

From here you can filter for and find exceptions in your applications and view a whole host of information about them. Including information about the server, client, etc. But my favorite feature is the small blue link at the bottom.

ExceptionInformationApplicaitonInsights

Click on this will take you to the faulting function, it doesn’t take you to the faulting line though (which i think it should) but you can mouse over it to see the line.

LinkToCodeWhereExceptionWasThrown

One of the other nice features, which was also in the web portal. is the +/- 5 minutes search.

5MinuteSearchEitherSideOfException

You can use this to run a search for all telemetry within 5 minutes either side of the exception. In the web portal there is also an option of “all telemetry of this session”, which is missing from the VS interface, I hope they will introduce this soon as well.

But the big advantage to this is if you have setup up App Insights for all of your tracking you will be able to see all of the following for that session or period:

  • Other Exceptions
  • Page Views
  • Debug logging (Trace)
  • Custom Events (If you are tracking thinks like feature usage in JavaScript this is very handy)
  • Raw Requests to the web server
  • Dependencies (SQL calls)

Lets take a look at some of the detail we get on the above for my +/- 5 Minute view

Below is an SQL dependency, this is logging all my queries. So I can see whats called, when, the time the query took to run, from which server, etc. This isn’t any extra code I had to write, App Insights will track all SQL queries that run from your application out of the box, once setup.

AppInsightsSQLDependancy

And dependencies won’t just be SQL, they will also be SOAP and REST requests to external web services.

Http Request monitoring the detail is pretty basic but useful.

HttpRequestMonitoring

And Page views you get some pretty basic info also. Not as good as some systems i have seen, but defiantly enough to help out with diagnosing exceptions.

PageViewAppInsights

I’ve been using this for a few days now and find it so easy to just open my solution in the morning and do a quick check for exceptions, narrow them down and fix them. Still needs another version or two before it has all the same features as the web interface, but defiantly worth a try if you have App Insights setup.


Automated SSRS Report Deployments from Octopus

Recently we started using the SQL Data Tools preview in 2015, its looking good so far, for the first time in a long time I don’t have to “match” the visual studio version I’m using with SQL, i can use the latest version of VS and support SQL version from 2008 to 2016, which is great, but it isn’t perfect. There is a lot of bugs in the latest version of data tools and some that Microsoft are refusing to fix that affect us.

One of the sticking points for me has always been deployment, we use octopus internally for deployment and try to run everything through that if we can to simplify our deployment environment.

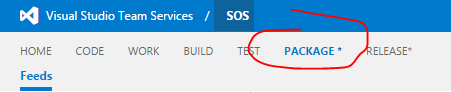
SSRS is the big one, so I’m going to go into how we do deployments of that.

We use a tools in SQL called RS.EXE this is a command line tool that pre-installs with SSRS for running vb scripts to deploy reports and other objects in SSRS.

You need to be aware with this tool though that based on which API endpoint you call using the “-e” command line parameter, that the methods will be different. And out of the box it defaults to calling the 2005 endpoint, which has massive changes to 2010.

A lot of the code i wrote was based on Tom’s Blog Post on the subject in 2011, however he was using the 2005 endpoint and I have updated the code to use the 2010 end point.

The assumption is that you will have a folder full of RDL files (and possibly some pngs and connection objects) that you need to deploy, so the VB script takes a parameters of a “source folder”, the “target folder” on the SSRS server, and the “SSRS server address” itself. I package this into a predeploy.ps1 file that I package up into a nuget file for octopus, the line in the pre-deploy script looks like the below.


rs.exe -i Deploy_VBScript.rss -s $SSRS_Server_Address -e Mgmt2010 -v sourcePATH="$sourcePath"   -v targetFolder="$targetFolder"

You will note the “-e Mgmt2010” this is important for the script to work, next is the Deploy_VBScript.rss


Dim definition As [Byte]() = Nothing
Dim warnings As Warning() = Nothing
Public Sub Main()
' Create Folder for the project if not exist
try

Dim descriptionProp As New [Property]
descriptionProp.Name = "Description"
descriptionProp.Value = ""
Dim visibleProp As New [Property]
visibleProp.Name = "Visible"
visibleProp.value = True
Dim props(1) As [Property]
props(0) = descriptionProp
props(1) = visibleProp
If targetFolder.SubString(1).IndexOf("/") <> -1 Then
Dim level2 As String = targetFolder.SubString(targetFolder.LastIndexOf("/") + 1)
Dim level1 As String = targetFolder.SubString(1, targetFolder.LastIndexOf("/") - 1)
Console.WriteLine(level1)
Console.Writeline(level2)
rs.CreateFolder(level1,"/", props)
rs.CreateFolder(level2 , "/"+level1, props)
Else
Console.Writeline(targetFolder.Replace("/", ""))
rs.CreateFolder(targetFolder.Replace("/", ""), "/", props)
End If
Catch ex As Exception
If ex.Message.Indexof("AlreadyExists") > 0 Then
Console.WriteLine("Folder {0} exists on the server",targetFolder)
else
throw ex
End If
End Try
Dim Files As String()
Dim rdlFile As String
Files = Directory.GetFiles(sourcePath)
For Each rdlFile In Files
If rdlFile.EndsWith(".rds") Then
'TODO Implment handler for RDS files
End If
If rdlFile.EndsWith(".rsd") Then
'TODO Implment handler for RSD files
End If
If rdlFile.EndsWith(".png") Then
Console.WriteLine(String.Format("Deploying PNG file {2} {0} to folder {1}", rdlFile, targetFolder, sourcePath))
Dim stream As FileStream = File.OpenRead(rdlFile)
Dim x As Integer = rdlFile.LastIndexOf("\")

definition = New [Byte](stream.Length) {}
stream.Read(definition, 0, CInt(stream.Length))
Dim fileName As String = rdlFile.Substring(x + 1)
Dim prop As new [Property]
prop.Name ="MimeType"
prop.Value="image/png"
Dim props(0) as [Property]
props(0)=prop
rs.CreateCatalogItem("Resource",fileName,targetFolder,True,definition,props,Nothing)
End If
If rdlFile.EndsWith(".rdl") Then
Console.WriteLine(String.Format("Deploying report {2} {0} to folder {1}", rdlFile, targetFolder, sourcePath))
Try
Dim stream As FileStream = File.OpenRead(rdlFile)
Dim x As Integer = rdlFile.LastIndexOf("\")

Dim reportName As String = rdlFile.Substring(x + 1).Replace(".rdl", "")

definition = New [Byte](stream.Length - 1) {}
stream.Read(definition, 0, CInt(stream.Length))

rs.CreateCatalogItem("Report",reportName, targetFolder, True, definition, Nothing, warnings)
If Not (warnings Is Nothing) Then
Dim warning As Warning
For Each warning In warnings
Console.WriteLine(warning.Message)
Next warning
Else
Console.WriteLine("Report: {0} published successfully with no warnings", reportName)
End If
Catch e As Exception
Console.WriteLine(e.Message)
End Try
End If

Next
End Sub

I haven’t yet added support for RDS and RSD files to this script. If someone wants to finish it off please share. Now its running PNGs and RDLs which is the main thing we update.

Now that all sounds too easy, and it was, the next issue i ran into was this one when deploying. The VS 2015 Data Tools client saves everything in 2016 format, and when I say 2016 format, i mean it changes the xmlns and adds a tag called “ReportParametersLayout”.

When you deploy from the VS client it appears to “rollback” these changes before passing the report to the 2010 endpoint, but if you try to deploy the RDL file from source it will fail (insert fun).

To work around this I had to write my own “roll back” script in the octopus pre-deploy powershell script, below:

Get-ChildItem $sourcePath -Filter "*.rdl" | `
Foreach-Object{
[Xml]$xml = [xml](Get-Content $_.FullName)
if($xml.Report.GetAttribute("xmlns") -eq "http://schemas.microsoft.com/sqlserver/reporting/2016/01/reportdefinition")
{
$xml.Report.SetAttribute("xmlns","http://schemas.microsoft.com/sqlserver/reporting/2010/01/reportdefinition")
}
if($xml.Report.ReportParametersLayout -ne $null)
{
$xml.Report.RemoveChild($xml.Report.ReportParametersLayout)
}
$xml.Save($sourcePath + '\' + $_.BaseName + '.rdl')
}

Now things were deploying w… no, wait! there’s more!

Another error I hit was this next one, I mentioned before MS are refusing to fix some bugs here’s one. We work in Australia, so Time Zones are a pain in the ass, we have some states on daylight savings, some not, and some that were that have now stopped. Add to this we work on a multi-tenanted application, so while some companies rule “We are in Sydney time, end of story” we cannot. So using the .NET functions for timezone conversion is a must as they take care of all this nonsense for you.

I make a habit of storing all date/time data in UTC that way in the database or application layer if you need to do a comparison its easy, then i convert to local timezone in the UI based on user preference or business rule, etc. Its because of this we have been using System.TimezoneInfo in the RDL files. As of VS 2012 and up, you get an error from this library in VS, the report will still run fine on SSRS when deployed, it just errors in the Editor in VS and wont preview or deploy.

We’ve worked around this by using a CLR function that wraps TimezonInfo example here. If you are reading this please vote this one up on connect, converting timezone in the UI is better.

After this fix things are running smoothly.


Application Insights, and why you need them

Metrics are really important for decision making. To often in business I hear people make statements based on assumptions, followed by justifications like “It’s an educated guess”, if you want to get educated you should use metrics to get your facts first.

Microsoft recently published a great article (From Agile to DevOps at Microsoft Developer Division) about how they changed their agile processes, and one of the key things I took out of it was the change away from the product owner as the ultimate source of information.

A tacit assumption of Agile was that the Product Owner
was omniscient and could groom the backlog correctly…

… the Product Owner ranks the Product Backlog Items (PBIs) and these are treated more or less as requirements. They may be written as user stories, and they may be lightweight in form, but they have been decided.

We used to work this way, but we have since developed a more flexible and effective approach.In keeping with DevOps practices, we think of our PBIs as hypotheses. These hypotheses need to be turned into experiments that produce evidence to support or diminish the experiment, and that evidence in turn produces validated learning.

So you can use metrics to validate your hypotheses and make informed decision about the direction of your product.

If you are already in azure its easy and free for most small to mid-sized apps. You can do pretty similar things with google analytics too, but the reason i like the App Insights is it combines server side monitoring and also it works nicely with the Azure dashboard in the new portal, so i can keep everything in once place.

From Visual studio you can simply right click on a project and click “Add Application Insight Telemetry”

AddApplicaitonInsightsWebProject

This will bring up a wizard that will guide you through the process.

AddApplicaitonInsightsWizard1.PNG

One gotcha i found though was that because my account was linked to multiple subscriptions i had to cancel out of the wizard, then login with the server explorer then go through the wizard again.

It adds a lot of gear to your projects including

  • Javascript libraries
  • Http Module for tracking requests
  • Nuget packages for all the ApplicaitonInsights libraries
  • Application insights config file with the Key from your account

After that’s loaded in you’ll also need to add in tracking to various areas, the help pages in the azure interface have all the info for this and come complete with snippets you can easily copy and paste for a dozen languages and platforms (PHP, C#, Phyton, Javascript, etc) but not VB in a lot of instances which surprised me 🙂 you can use this link inside the Azure interface to get at all the goodies you’ll need

HelpAndCodeSnippetsApplicationInsights

Where I recommend adding tracking at a minimum is:

Global.ascx for web apps


public void Application_Error(object sender, EventArgs e)
{
// Code that runs when an unhandled error occurs

// Get the exception object.
Exception exc = Server.GetLastError;

log.Error(exc);
dynamic telemetry = new TelemetryClient();
telemetry.TrackException(exc);
Server.ClearError();

}

Client side tracking copy the snippet from their interface

Add to master page or shared template cshtml for MVC.

GetClientSideScriptCode


Also you should load it onto your VMs as well, there is a web platform installer you can run on your windows boxes that will load a service on for collecting the stats.

WebPlatformApplicationIsightInstaller

InstallApplicaitionInsightsWindowsServer

Warning though that the above needs a IISReset to complete. A good article on the setup is here.

For tracking events I normally create a helper class that wraps all my calls to make things easier.

Also as a lot of my apps these days are heavy JavaScript I’m using the tracking feature in JavaScript a lot more. The snippet they give you will create a appInsights object in the page you can reuse through your app after startup.

Below is an example drawn from code I put into a survey App recently, not exactly the same code but I will use this as an example. This is so we could track when a user answers a question incorrectly (i.e. validation fails), there is a good detailed article on this here

appInsights.trackEvent("AnswerValidationFailed",
{
SurveyName: "My Survey",
SurveyId: 22,
SurveyVersion: 3,
FailedQuestion: 261
});

By tracking this we can answer questions like

  • Are there particular questions that users fail to answer more often
  • Which surveys have a higher failure rate for data input

Now that you have the ability to ask these questions you can start to form hypotheses. For example i make make a statement like;

“I think Survey X is too complicated for users and needs to be split into multiple smaller surveys”

To validate this I could look at the metrics collected for the above event for the user error rate on survey X compare to other surveys and use this as a basis for my hypotheses. You can sue the metrics explorer to create charts that map this out for you, filtering by you event (example below)

MetricExplorerEventFilter

Then after the change is complete I can use the same metrics to measure the impact of my change.

This last point is another mistake I see in business a lot, too often changes is made, then no one reviews success. What Microsoft have done with their “Dev Ops” process embeds into their metrics into the process. So by default you are checking your facts before and after change, which is the right way to go about things imo.


TypeScript Project AppSettings

Ok so there’s a few nice things that MS have done with typescript, but Dev time vs build time vs deploy time they don’t all work the same, so there’s a few things we’ve done to make the F5 experience nice while making sure the build and deployed results are the same.

In the below examples we are using

  • Visual Studio 2015
  • Team City
  • Octopus Deploy

Firstly TypeScript in Visual Studio has this nice feature to wrap up your typescript into a single js file while your coding. It’ll save to this file as you are saving your TS files, so its nice for making code changes on the fly while debugging, and you get a single file output.

TypeScriptCombine

Also this will build when TeamCity runs msbuild as well. But don’t check this file in, its compile ts output, it should be treated like binary output from a C# project.

And you can further minify and compact this using npm (see this post for details).

This isn’t prefect though, because we shovel our static content to a separate CDN that is spared between environments (Folder per version), and we have environment specific JavaScript variables that need to be set, this can’t be done in a TypeScript file as they all compile into a single file. I could use npm to generate the TypeScript into 2 files but this conflicts too much with the developers local setup in using the above feature from my tests.

So we pulled it into a js file that is separate form the type script, this obviously though causes the type script to break as the object doesn’t exist. So we added a declaration file for it like below:

declare var AppSetting: {
url: string;
baseCredential: string;
ApiKey: string;
}

Then drop the actual object in a JavaScript file with the tokens ready for octopus, with a simple if statement to drop in the Developers local settings when running locally.


var AppSetting;
(function (AppSetting) {
if (window.location.hostname == "localhost") {
AppSetting.url= "http://localhost:9129/";
AppSetting.baseCredential= "XXXVVVWWW";
AppSetting.ApiKey= "82390189wuiuu";
} else {
AppSetting.url= "#{url}";
AppSetting.baseCredential= "#{baseCredential}";
AppSetting.ApiKey= "#{ApiKey}";
}
})(AppSetting || (AppSetting = {}));

This does mean we need a extra http request to pull down the appSetting js file for our environment, but it means we can maintain our single CDN for static content/code like we have traditionally done.

Packaging Large Scale JS projects with gulp

Large scale JS projects have become a lot more common with the rise of AngularJS and other javascript frameworks.

Laying out your project though you want to have your source in a lot of separate files to keep things neat and in a structure, but you don’t want you browser making  a few hundred connections to the web server on every page load.

I previous blogged about a simple JS and CSS minify and compress for a C# based project, but this time I’m looking at a small AngularJS project that has over 50 js files.

I’m using VS 2015 with the Web Essentials add-on, so in the package.json file can put my npm requirements and they will download, with 2013 i previously had to run npm on my local each time I setup to get them, the new VS is way better for these tasks, if you haven’t upgraded to 2015 you should download it now.

There is 3 important files highlighted below

GulpPackageJsonBower.PNG

Firstly lets look at my package json file:

package.json

in here you can add all your npm dependencies and VS with run npm in the background to install them, as you are typing.

Next is the bower.json file

bower.sjon.png

This is used for managing your 3rd party libraries, traditionally when throwing in 3rd party js libraries I would use a CDN, however with Angular, you will end up with a bunch of smaller libraries that will end you up with too many CDN references, so you are better off using bower to download them into your project, then from there combine them (They will already be uglifyd in most cases).

Now there is also a “.bowerrc” file that i have added, because i don’t like the default path


{
"directory": "app/lib"
}

Again as with the package json it will start downloading these as you type and press save, also to note it doesn’t clean up if you delete one, so you’ll  need to go into the target location and delete the folder manually.

Lastly the Gulpfile.js file, here is where we bring it all together.

In the example below I am processing 2 lots of javascript, the 3rd party libraries into a lib.min.js and our code into scripts.min.js. I could also add a final step to combine them as well.

The good thing about the below is that as i add new js files to my /app/scripts folder, they automatically get combined into the main script file, and when a add new 3rd party libraries the will automatically get added to the 3rd party script file (hence the aforementioned change to the bowerrc file).

The 3rd party libraries tend to sometimes get painful though, you can see below that i am not minifing them only joining, the ones i’m using are all minified already, but sometimes you will get ones that aren’t, also one of the packages i am using contains the jQuery1.8 libraries that it appears to use for some sort of unit test, so i had to exclude this file specifically, so be prepared for some troubleshooting with this.


/// <binding BeforeBuild='clean' AfterBuild='minify, scripts' />
// include plug-ins
var gulp = require('gulp');
var concat = require('gulp-concat');
var uglify = require('gulp-uglify');
var del = require('del');
var rename = require('gulp-rename');
var minifyCss = require('gulp-minify-css');
var sourcemaps = require('gulp-sourcemaps');

gulp.task('default', function () {
});

//Define javascript files for processing
var config = {
AppJSsrc: ['App/Scripts/**/*.js'],
LibJSsrc: ['App/lib/**/*.min.js', '!App/lib/**/*.min.js.map',
'!App/lib/**/*.min.js.gzip', , 'App/lib/**/ui-router-tabs.js',
'!App/lib/**/jquery-1.8.2.min.js']
};

//delete the output file(s)
gulp.task('clean', function () {
del(['App/scripts.min.js']);
del(['App/lib.min.js']);
return del(['Content/*.min.css']);
});

gulp.task('scripts', function () {
// Process js from us
gulp.src(config.AppJSsrc)
.pipe(sourcemaps.init())
.pipe(uglify())
.pipe(concat('scripts.min.js'))
.pipe(sourcemaps.write('maps'))
.pipe(gulp.dest('App'));
// Process js from 3rd parties
gulp.src(config.LibJSsrc)
.pipe(concat('lib.min.js'))
.pipe(gulp.dest('App'));
});

gulp.task('minify', function () {
gulp.src('./Content/*.css')
.pipe(minifyCss())
.pipe(rename({
suffix: '.min'
}))
.pipe(gulp.dest('Content/'));
});

So now i end up with two files outputted

BuildOutputJavaScriptFiles.PNG

oh and don’t for get to add tehse fiels to your gitignore or tfignore so they don’t get checked in. and also make sure you add “note_modules” and your 3rd party library folder as well, you don’t want to be checking in your dependencies, I’ll do another blog post about using the above dependencies in the build environment.

Just to note, not having node_modules in my gitignore killed VS2015s integration with github causing a error about the path being longer than 260 characters. Prevented me checking in and refused to acknowledge the project was under source control.

And in my app i only need to script tags


<script src="App/lib.min.js"></script>
<script src="App/scripts.min.js"></script>

You will also note in the above processing I have a source map file output, this is essential for debugging the scripts. These map files wont get download unless the browser is in debugging mode and you should use your build/deployment environment to exclude from production, to stop people decompressing you js code.

You can see from the screen shot below with me debugging on my local, firebug is able to render the original javascript code for me to debug and step through the code just like it was uncompressed, with the original file names and all.

DebugFireFoxSourceMapFiles

Private Nuget Servers – Klondike

UPDATE: A better solution I think is to use VSTS’s new package Management feature if you are using VSTS already.

Nuget is a great way to share packages around, but a lot of the LOB apps I work on we need a private solution that isn’t open to the public. I’ve setup Klondike (https://github.com/themotleyfool/Klondike) a couple of times now and find it to be light weight and dumb enough not to give any problems.

I even used it for my octopack nuget files (instead of the built in nuget server in octopus) as I find it handy just to have all your nuget in the one place.

Installation is easy, just extract it to a folder and point an IIS webroot at it. Supports self-hosted in OWIN as well if that is more your flavor.

To get everything setup i generally set this value in the web.config, it treats all request from the local server as admin. So using a web browser on the local server I get everything setup.


&lt;add key=&quot;NuGet.Lucene.Web:handleLocalRequestsAsAdmin&quot; value=&quot;true&quot; /&gt;

I’ve dropped this on servers on a domain before and used windows auth as well for authentication at an IIS level, which works fine. You could also use Basic Auth and create user accounts on the local server to manage access which I’ve done as well without any complaints.

In general terms, most projects in private sources that I work on, if you have access to the source control you should have permission to read from the nuget server, so I leave the credentials for the nuget server in my nuget.config at the root of each project in source.

Example configuration below from one of my projects:


&lt;?xml version=&quot;1.0&quot; encoding=&quot;utf-8&quot;?&gt;
&lt;configuration&gt;
&lt;activePackageSource&gt;
&lt;add key=&quot;All&quot; value=&quot;(Aggregate source)&quot; /&gt;
&lt;/activePackageSource&gt;
&lt;packageRestore&gt;
&lt;add key=&quot;enabled&quot; value=&quot;true&quot; /&gt;
&lt;/packageRestore&gt;
&lt;solution&gt;
&lt;add key=&quot;disableSourceControlIntegration&quot; value=&quot;true&quot; /&gt;
&lt;/solution&gt;
&lt;packageSources&gt;
&lt;add key=&quot;MyNugetServerInAzure&quot; value=&quot;https://MyOctopusServer.cloudapp.net:88/&quot; /&gt;
&lt;add key=&quot;nuget.org&quot; value=&quot;https://nuget.org/api/v2/&quot; /&gt;
&lt;/packageSources&gt;
&lt;packageSourceCredentials&gt;
&lt;MyNugetServerInAzure&gt;
&lt;add key=&quot;Username&quot; value=&quot;MyUserAccount&quot; /&gt;
&lt;add key=&quot;ClearTextPassword&quot; value=&quot;XXXXX /&gt;
&lt;/MyNugetServerInAzure&gt;
&lt;/packageSourceCredentials&gt;
&lt;/configuration&gt;

And then create the User Account in the Computer Manager on the server and setup IIS Authenticaiton on the Klondike website like so:

IISAUthSettingsKlondike

And you are away. I have had odd issues using the above with the role mappings, so i generally leave these settings alone

&lt;roleMappings&gt;
&lt;add key=&quot;PackageManager&quot; value=&quot;&quot; /&gt;
&lt;add key=&quot;AccountAdministrator&quot; value=&quot;&quot; /&gt;
&lt;/roleMappings&gt;

The only thing to point out in the config I change generally for Klondike is is


&lt;add key=&quot;NuGet.Lucene.Web:localAdministratorApiKey&quot; value=&quot;XXX&quot; /&gt;

And drop in an API key to use when updating packages, I don’t always give this out to all the developers working on it, but instead save the API key in the build server to force check-in to update packages via the build system.

One last issue i have with Klondike is this error “The process cannot access the file ‘C:\inetpub\wwwroot\App_Data\Lucene\write.lock’ because it is being used by another process.”

KlondikeError

If you recycle the worker process this happens, touch the web config file and it will fix it up.

Test Manager Workflow, Manual to Automation

We’ve been using a lot of Test Manager Lately and I am really happy with the work flow that is built into TFS with this product.

We have full time testers who don’t have a lot of experience with code, so you can’t give them tools like the CUIT recorder in visual studio and expect them to run with it. But they are the best people to use tools like this because they understand testing more, and also in my experience testers tend to be more thorough than developers.

The other thing I like about the workflow is that its “Documentation First”, so your documentation is inherently linked into the Test platform.

Microsoft Test Manager’s recorder tools is a good cut down version of CUIT that makes things easier for the testers to record manual tests but not get caught up in code.

That being said, it is a pain in the ass to get running, we have a complicated site with a lot of composite controls, so the DOM was a bit ugly, and this made it a painful exercise to get any recorder going (We also tried Teleirk Test Studio and Selenium with similar issues as well, but Telerik Test Studio was probably the best out of them)

The basic workflow in Test Manager Stars with the Test Case work Item, from a test Case you outline your test steps

TestManagerCreateTestCase

The important thing here is the use of parameters, you can see in the above example that I am using @URL, @User and @Pass.

In the test case you can input n number of iterations of these, then when creating the test recorder it will play back one iteration per set, this allows testers to go nuts with different sets and edge cases (e.g. 200 Ws for a name, all the special characters in the ASIC set for someone’s last name, Asian character sets, and so on).

Once the documentation is done the test recorder is used (with IE, doesn’t work in other browsers) to save a recorded case. Which can then be played back while someone is watching, which is the first level of automation, i think this is an important first step, because in your development flow if you are working on a new features (requiring a new test case) then you want a set of eyes looking at it first, you don’t want to straight away go to full automation.

It’s important to note though that the test recorder cannot be used to “Assert” values like CUIT, validation of success is done by the Tester looking at the screen and deciding.

When you have past all your newly created test cases and your new features are working, Product Owner and stakeholders are all happy with the UI, this is the point you want to go to full Automation with your UI tests.

When creating a CodedUI test one of the options is to “Use an existing Recording”

ImportTestFromRecording

After selecting this you can search through your work items for the test case and Visual Studio will pull out the recording and generate your CodedUI test starting with what your testers have created.

SearchWorkItemsForTestRecording

That will go through and generate something like the below code.


[DataSource("Microsoft.VisualStudio.TestTools.DataSource.TestCase", "https://MyTFSServer/tfs/defaultcollection;MyProject", "13934", DataAccessMethod.Sequential)]
[TestMethod]
public void CodedUITestMethod1()
{
// To generate code for this test, select "Generate Code for Coded UI Test" from the shortcut menu and select one of the menu items.
this.UIMap.GoToURLParams.UIboxLoadBalanceWindowUrl = TestContext.DataRow["URL"].ToString();
this.UIMap.GoToURL();
this.UIMap.EnterUserandPassParams.UITxtEmailEditText = TestContext.DataRow["User"].ToString();
this.UIMap.EnterUserandPassParams.UITxtPasswordEditPassword = Playback.EncryptText(TestContext.DataRow["Pass"].ToString());
this.UIMap.EnterUserandPass();
this.UIMap.ClickLoginbutton();
}

The great thing about this is that we can see the attribute for the datasource, it refers to the TFS server and even the work item ID. so this is where the CodedUI test is going to get its data.

So your testers can maintain the data in their Test Plans in TFS and the testing automation will look back into these TFS work items to get their data each time they run.

Now that you are in the CUIT environment you can start to use the CUIT recorder to add Asserts to your tests and validate data. In the above example we might do something like Assert that username text displayed on the page after login is the same as the value we logged in as.

Now we have a working Coded UI test we can add it to a build.

I generally don’t do CodeUI Tests in our standard builds, I don’t know anyone that does, we use n-Tier environment, so in order to run a single app you would need to start up a couple service layers and a database behind it. So i find it better to create a separate solution and builds for the coded UI test and schedule them to run after a full deploy of all layers to test environment overnight.

As in the example above, we put the initial “Open this URL in the Browser” step’s URL as a parameter, so if we want to change the target to another environment, or point it at local host, this is easy, and i defiantly recommend doing this.

So putting it all together we have the below work flow:

WorkflowTestManager

Now the thing I like about this is they all feed from the same datasource, which is a Documented Test Plan from your testers, who can then updated a single datasource that’s in a format they not only understand but have control over.

Take the example you are implementing Asian Language support. In the above example you could simple add a new parameter set to the test case that has a Chinese character username in it, which could be done by a tester, then if it wasn’t support the build would start failing.

Lastly I mentioned before IE only, that’s for recording, there is some plugins to allow playback in different browser that I will be checking out soon and make some additional posts about.

This process also works well into your weekly sprint cycles, which I will go into in another post.